1. Good to know
a. Estimated savings: 85 €!
b. Duration: 2h
c. Difficulty: ¾
d. Perform the operation with the vehicle cold
e. Perform the operation on a flat floor
f. Read the tutorial “Raise your vehicle safely” before performing this operation
2. Checklist of preparation
| Tools | Consumables |
| · Jack · Candle x 2 · Wood Cleat · Wheel Stud Wrench · Electric Wire · Screwdriver · 13- piece wrench · Wire brush · Large pawl · Torx tip 55 · Screwdriver · Small pawl + extension · Torx tip 30 | · Brake cleaner · Copper grease |
3. It’s gone … hands in grease!
3.1. Remove the disc
a. Turn off vehicle ignition, apply parking brake, and pull hood opening handle
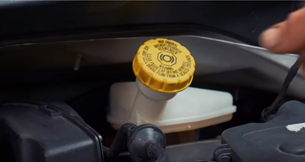
b. Open the hood and open the brake fluid reservoir
c. In order to achieve the change of the discs and pads on the vehicle, it is necessary to lift the front of it, and remove the wheels to have full access to the discs.
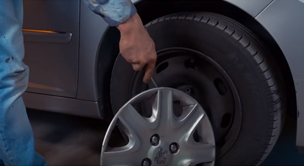
d. Loosen the front wheel studs and lift the front of your vehicle, and place it on both candles so that you can remove both wheels. Do not forget to slip them under the vehicle (see “Raising your vehicle safely” tutorial).
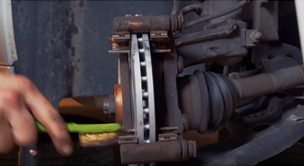
e. Aim the disc outwards, this will facilitate the intervention and insert a flat screwdriver at the outer end of the oblong hole on the front of the caliper.
f. Leverage the screwdriver by pulling toward you to release it. This has the effect of retracting the piston.
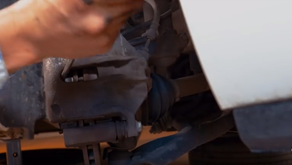
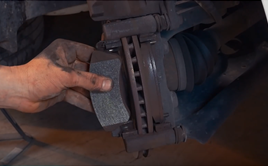
g. Using a 13 flat ratchet wrench, unscrew the lower column screw. It may be necessary to prevent the counter nut from turning by holding it with your fingers. Tilt the caliper upwards, and remove the pads. To do this, slide them away from the disc.
h. Return the caliper to the initial position.
i. Tip: Attach a piece of electrical cable or a piece of string to one of the turns of the suspension spring.
j. With a flat ratchet wrench of 13, remove the upper column screw. Once removed, it frees the stirrup.
k. To avoid damaging the brake hose, attach it to the suspension using the previously installed cable.
l. To unlock the disc, insert a thin screwdriver so that it fits between the two sides of the disc. It will be necessary to insert it before the screed so that it can come against the latter.
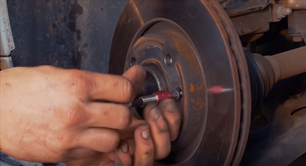
m. Using a Torx tip of 25, unlock the two screws holding the disc. Remove the screwdriver.
n. Using a Tee force and a Torx socket 55, release the two screws that secure the yoke clevis. To save time, finish the removal using the ratchet and the Torx bit. Remove the screed.
o. Finish removing the drive retaining screws to remove the drive.
3.2. Change the disc
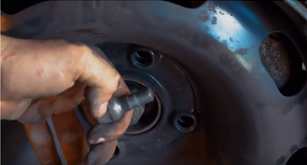
p. Clean the hub with a wire brush and then coat it with copper grease. This will prevent oxidation deterioration and facilitate future interventions.
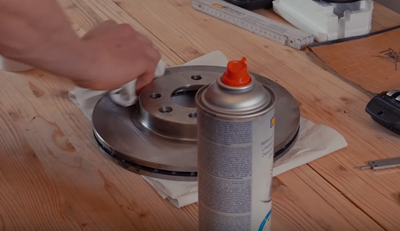
q. Before installing the new disc, it is necessary to clean it with brake cleaner and paper towel to remove the storage paraffin.
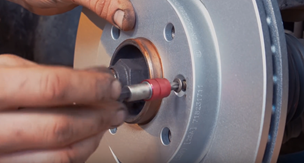
r. If it is a painted disc, place it directly on the wheel hub. Install the new disc and tighten the two fixing screws by hand.
s. Reassemble the clevis screwing again at first hand, and finishing with a ratchet and Torx socket 55 to block them.
t. Reuse the screwdriver’s technique to block the rotation of the disc and to be able to block the screws of the latter.
3.3. Change the pads
u. Using a wire brush, clean the anti-noise plates of the caliper on both sides of the disc.
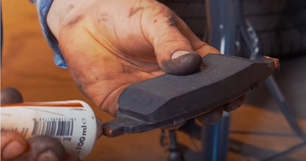
v. Coat the tips of the new pads with copper grease and slide them into the clevis.
w. Detach the caliper and put it back in place. Begin by reassembling the upper column screw, always by hand. You can now replace the caliper and reassemble the lower column screw. Do not forget to put the new screw supplied which is pre-coated with net brake.
x. You can now repeat the operation on the other side.
there. Remove the electrical cable that was used to hold the caliper.
3.4. Refitting the vehicle
z. Replace the wheels of the vehicle and rest it on the ground.

aa. Before restarting, refit the brake fluid cap.
bb. Attention, before reuse the vehicle, start it, pump on the brake pedal to bring the pads of the disc.
cc. Think of adopting a flexible and unbridled driving the first 50 kilometers not to ice new pads.
dd. Done !